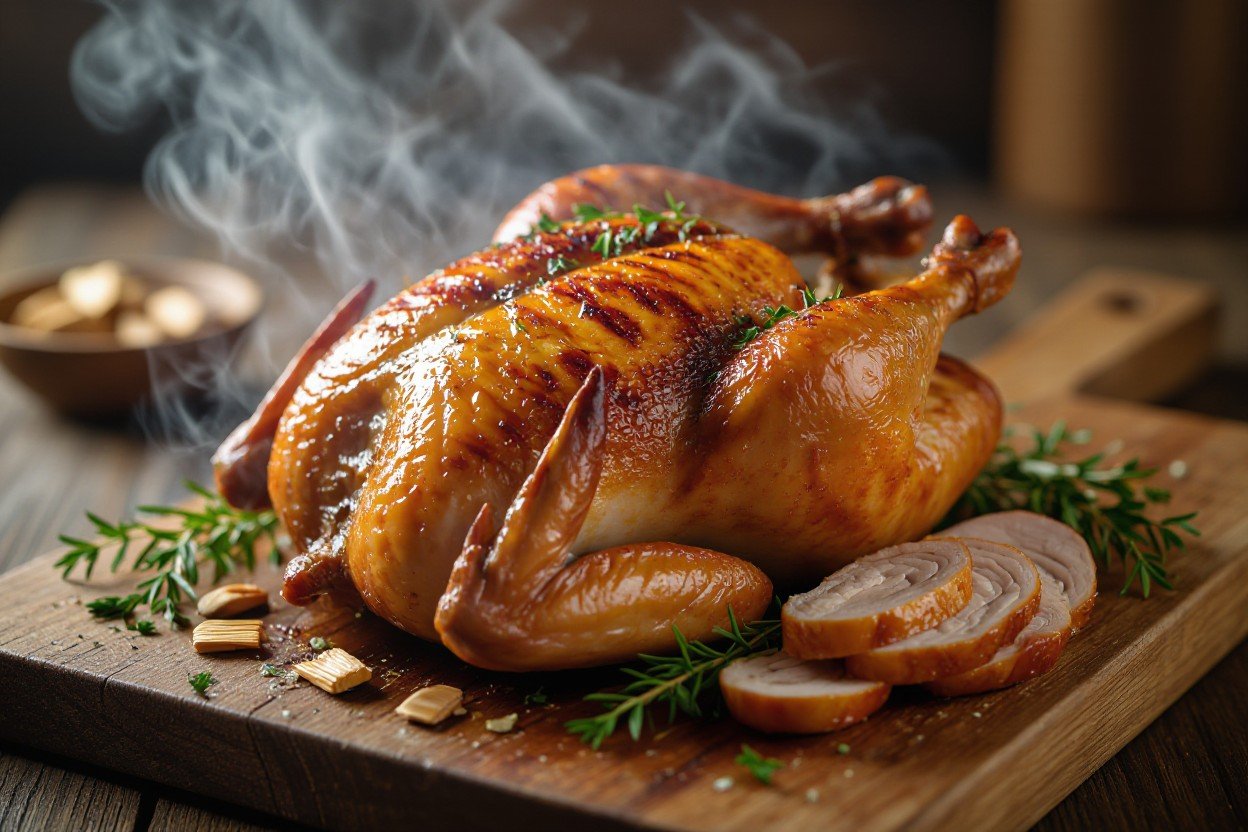
Smoked Whole Chicken
Just imagine biting into tender, juicy chicken infused with rich, smoky flavors that penetrate every layer of meat. Smoking a whole chicken transforms an ordinary bird into an extraordinary meal that will impress your family and guests alike. This low-and-slow cooking method allows you to achieve perfectly crispy skin while keeping the meat incredibly moist. Whether you’re a seasoned pitmaster or new to smoking meats, mastering this technique will elevate your backyard cooking game. With the right temperature, seasoning, and patience, you’ll create a restaurant-quality dish in your own outdoor kitchen.
Key Takeaways:
- Smoking a whole chicken typically takes 3-4 hours at 225-250°F, and the internal temperature should reach 165°F in the thickest part of the thigh for safe consumption.
- Brining the chicken for 4-12 hours before smoking helps keep the meat moist and adds flavor, while applying a dry rub enhances the exterior with a flavorful bark.
- Using fruit woods like apple or cherry produces a milder, sweeter smoke flavor that complements poultry better than stronger woods like hickory or mesquite.
Choosing the Right Chicken
The chicken you select will make or break your smoking experience. A 4 to 5-pound bird hits the sweet spot for most backyard smokers, giving you enough meat to feed a family of four while cooking evenly in about 3 to 4 hours at 225°F. Anything larger than 6 pounds risks drying out before the meat near the bone reaches a safe internal temperature of 165°F. You’ll also want to inspect the packaging date—fresh chicken that’s been refrigerated for less than two days will have better moisture content and cleaner flavor than something that’s been sitting for a week.
Look for chickens with plump, unblemished skin and a fresh smell. Avoid any birds with tears in the skin or excessive liquid in the package, which signals the meat has been frozen and thawed. The color should be creamy white to light yellow, depending on the chicken’s diet. If you’re buying from a butcher counter, ask when the chicken arrived—you want the freshest bird possible since you’ll be cooking it low and slow, which gives any off-flavors time to concentrate.
Selecting the Size
Your smoker’s capacity and cooking time should drive your size decision. A 4-pound chicken fits comfortably in most offset smokers and kettle grills while maintaining consistent airflow around the bird. This size also allows the smoke to penetrate evenly, creating that coveted smoke ring without overcooking the outer meat. If you’re feeding a crowd, smoking two 4-pound chickens works better than wrestling with a single 8-pounder that will take twice as long and risk uneven cooking.
Smaller chickens under 3.5 pounds, often labeled as broilers, cook too quickly for proper smoke absorption—you’ll end up with barely any smoke flavor before they hit temperature. Larger roasters over 6 pounds require extended smoking times that can turn your skin rubbery instead of crispy. The extended exposure to lower temperatures also means more moisture loss from the breast meat, leaving you with dry, stringy texture despite your best efforts with brining or basting.
Organic vs. Conventional
Organic chickens typically have firmer meat and more developed flavor due to their longer growing period—around 81 days compared to 47 days for conventional birds. This extra time translates to denser muscle tissue that holds up better during long smoking sessions. You’ll notice organic birds have more yellow-tinted skin from their vegetarian, corn-and-soy diet, which crisps beautifully when exposed to smoke and renders a richer-tasting fat.
Conventional chickens cost about 40% less and still produce excellent results when smoked properly. The key difference lies in texture rather than safety—both must meet USDA standards. Conventional birds tend to have higher water content, which means you’ll see more liquid in your drip pan and slightly less concentrated flavor. They also have thinner skin that requires more attention to temperature management to achieve that ideal crispy exterior.
Your budget and flavor preferences should guide this choice. Organic chickens shine when you’re using minimal rubs and want the natural poultry flavor to dominate, while conventional birds work perfectly fine with bold spice blends and heavy smoke woods like hickory or mesquite that mask subtle taste differences. The smoking process itself—your wood choice, temperature control, and timing—will have more impact on the final result than the organic label alone.
Preparing the Chicken
The preparation phase sets the foundation for how well smoke penetrates the meat and how flavorful your final product becomes. You’ll want to start by removing the chicken from its packaging and patting it completely dry with paper towels—moisture on the skin prevents proper seasoning adhesion and creates steam instead of allowing the smoke to work its magic. Next, trim away any excess fat around the cavity opening and neck area, as these pieces can cause flare-ups during smoking. Some pitmasters prefer to spatchcock their birds by removing the backbone, which reduces cooking time by 30-45 minutes and ensures more even heat distribution, though a traditional whole bird presentation has its own appeal.
Your chicken needs to come to room temperature before it hits the smoker, so pull it from the refrigerator about 45 minutes before you plan to start cooking. This step prevents the outer portions from overcooking while the interior struggles to reach safe temperatures. During this resting period, you can tuck the wing tips behind the breast to prevent them from burning—a technique chefs call “trussing the wings”—and tie the legs together with kitchen twine to maintain a compact shape that promotes even cooking.
Brining Techniques
Brining transforms an ordinary chicken into something extraordinary by increasing moisture retention by up to 25% during the smoking process. A basic wet brine consists of 1/4 cup of kosher salt and 1/4 cup of sugar dissolved in 4 cups of water, with your chicken submerged for 4-6 hours in the refrigerator. You can elevate this base recipe by adding aromatics like crushed garlic cloves, bay leaves, peppercorns, or fresh herbs such as thyme and rosemary. The salt in the brine breaks down protein structures, allowing the meat to absorb and retain more liquid while also seasoning it from the inside out.
Dry brining offers a simpler alternative that delivers equally impressive results without the hassle of finding refrigerator space for a large container of liquid. Apply 1 tablespoon of kosher salt per 4 pounds of chicken directly to the skin and inside the cavity, then refrigerate uncovered for 12-24 hours. This method draws out moisture initially, which then dissolves the salt and gets reabsorbed into the meat along with the seasoning. The uncovered refrigeration also dries out the skin, which leads to that coveted crispy exterior once the chicken hits the smoke. Many competition barbecue teams have switched exclusively to dry brining because it produces better bark formation and more concentrated flavors.
Seasoning and Rubs
Your rub application technique matters just as much as the blend itself. Start with a base layer of coarse black pepper and paprika—about 2 tablespoons of each for a 5-pound bird—which creates the foundation for your bark. Garlic powder, onion powder, and a touch of cayenne add depth without overwhelming the natural chicken flavor. Apply your rub at least 30 minutes before smoking to allow the spices to adhere properly, or up to 2 hours if you want the flavors to penetrate deeper. Work the seasoning under the skin of the breast meat by carefully separating it with your fingers, which allows direct contact between the spices and the meat.
The ratio of sweet to savory elements in your rub determines the final flavor profile you’ll achieve. Brown sugar or turbinado sugar at about 1 tablespoon per bird caramelizes during smoking and creates a beautiful mahogany color, but too much sugar burns at temperatures above 275°F. Balance is everything—a Memphis-style rub might include equal parts paprika and brown sugar, while a Texas approach leans heavily on black pepper and uses minimal sweeteners. Don’t be afraid to experiment with additions like ground coffee, which adds earthiness, or dried mustard powder for a subtle tang that cuts through the richness of the dark meat.
You can layer flavors by applying different seasonings at different stages of the cooking process. Some pitmasters dust their chicken with a light coating of rub before smoking, then apply a second, heavier layer halfway through cooking once the first application has set into the developing bark. This two-stage approach builds complexity and prevents the exterior from becoming too salty or overpow
Smoking Equipment
Your smoker choice directly impacts the flavor profile, cooking time, and overall quality of your finished chicken. Each type of smoker operates differently and requires its own learning curve, but all can produce exceptional results when used correctly. The market offers everything from budget-friendly options under $100 to professional-grade units costing thousands, so you’ll need to match your equipment to your experience level and commitment to the craft.
Temperature control separates successful smoking sessions from disappointing ones. Digital smokers maintain consistent heat with minimal intervention, while traditional offset smokers demand active monitoring and adjustment throughout the cook. Your climate also plays a role—windy conditions or cold weather will challenge certain smoker types more than others, potentially adding 30-60 minutes to your total cooking time.
Types of Smokers
Offset smokers remain the gold standard for traditional barbecue enthusiasts who want maximum smoke flavor. The firebox sits separate from the cooking chamber, allowing you to add wood and charcoal without disturbing your chicken. These units require the most attention but reward you with authentic smoke rings and bark development that other smokers struggle to match.
| Smoker Type | Best For |
| Offset Smoker | Traditional flavor, experienced users |
| Pellet Smoker | Convenience, consistent temperature |
| Electric Smoker | Beginners, apartment dwellers |
| Kamado Grill | Fuel efficiency, versatility |
| Propane Smoker | Quick setup, portable use |
- Pellet smokers use automated augers to feed compressed wood pellets, maintaining your target temperature within 5-10 degrees
- Electric smokers plug into standard outlets and work well in spaces where open flames aren’t permitted
- Kamado grills excel at heat retention, using 50% less fuel than traditional smokers while holding steady temperatures for 8+ hours
- Propane models heat up in 10-15 minutes compared to 30-45 minutes for charcoal options
- The choice ultimately depends on your available space, budget constraints, and how hands-on you want your smoking experience to be
Essential Accessories
A reliable instant-read thermometer ranks as your most important accessory, period. Digital probe thermometers with wireless connectivity let you monitor both chamber and meat temperature from inside your house, eliminating constant trips to check on your chicken. Models like the ThermoWorks Smoke or Meater Plus provide alerts when temperatures drift outside your target range or when your chicken reaches the perfect 165°F internal temperature.
Heat-resistant gloves rated to 500°F or higher protect your hands when rotating the chicken or adjusting vents during the smoke. Silicone gloves offer better dexterity than traditional welding gloves, making it easier to handle small tools and probes. You’ll also want a quality spray bottle for spritzing your chicken every 45-60 minutes with apple juice or apple cider vinegar, which helps develop that coveted mahogany exterior while keeping the skin from drying out during the long cook.
Drip pans catch rendered fat and juices, preventing flare-ups that can turn your carefully smoked chicken into a charred disaster. Aluminum pans work fine, but stainless steel versions last for years and distribute heat more evenly beneath your bird. Wood chips or chunks in varieties like apple, cherry, or hickory provide the smoke, with chunks burning longer and more consistently than chips—figure on 4-6 chunks for a complete chicken smoke, adding fresh wood every hour to maintain that thin blue smoke you’re after.
Smoking Process
You’ll want to preheat your smoker to the target temperature before placing the chicken inside. This ensures consistent heat from the moment the bird enters the chamber, preventing temperature fluctuations that can dry out the meat. Wood choice matters significantly here – hickory delivers a bold, bacon-like flavor, while apple or cherry woods provide a milder, slightly sweet profile that complements poultry beautifully. Add your wood chunks or chips once the smoker reaches temperature, waiting until you see thin, blue smoke rather than thick white smoke, which can create bitter flavors.
Position the chicken breast-side up on the grate, ensuring adequate space around it for smoke circulation. You can place a drip pan filled with water, apple juice, or beer beneath the chicken to catch drippings and maintain moisture levels inside the smoker. Avoid opening the smoker door frequently during the process – each peek releases heat and smoke, extending your cooking time by 10-15 minutes and disrupting the carefully controlled environment you’ve created.
Temperature Control
Maintaining steady heat throughout the smoking process separates mediocre results from restaurant-quality chicken. Your smoker should hold between 225°F and 250°F consistently, with minimal fluctuation. Digital thermometers with dual probes work best – one monitors the smoker’s ambient temperature while the other tracks the chicken’s internal temperature in real-time.
Temperature Guidelines for Smoking Chicken
| Temperature Zone | Purpose & Result |
| 225°F | Lower end for maximum smoke absorption; expect 4+ hours cooking time |
| 250°F | Sweet spot balancing smoke flavor with crispy skin; approximately 3-3.5 hours |
| 275°F | Higher heat for crispier skin; reduces cooking time to 2.5-3 hours |
| 165°F (internal) | Minimum safe internal temperature in breast and thickest parts |
| 175°F (internal thighs) | Optimal temperature for dark meat tenderness and rendered fat |
Cooking Time
A standard 4-5 pound whole chicken requires approximately 3 to 4 hours at 250°F, though variables like outdoor temperature, wind conditions, and your specific smoker model can affect this timeline. Larger birds weighing 6-7 pounds may need an additional 30-60 minutes. You’ll notice the skin beginning to bronze after the first hour, with deeper mahogany tones developing as the bird approaches completion. Plan for roughly 45 minutes per pound as a general guideline, but always rely on internal temperature rather than time alone.
Your chicken reaches the finish line when the breast meat hits 165°F and the thigh meat registers between 170-175°F. Insert your probe thermometer into the thickest part of the breast without touching bone, then check the innermost section of the thigh as well. The legs should wiggle freely in their sockets, and juices should run clear when you pierce the skin between the leg and body. Some pitmasters increase smoker temperature to 300°F for the final 20-30 minutes to crisp the skin further, though this step remains optional depending on your texture preferences.
Flavor Variations
The beauty of smoking a whole chicken lies in the endless possibilities for customization. Your choice of wood, rubs, marinades, and glazes can transform the same basic technique into completely different flavor profiles. A simple swap from hickory to applewood changes the entire character of the finished bird, while a tangy vinegar-based marinade versus a sweet honey glaze creates two distinctly different meals. You’ll want to experiment with different combinations to discover your signature style.
Building your flavor profile starts with understanding how different elements work together. Strong, assertive woods pair well with bold spice rubs, while milder woods complement delicate herb marinades. The timing of when you apply glazes matters too—brush them on too early and they’ll burn, too late and they won’t develop that beautiful caramelized finish. Most pitmasters apply glazes during the last 30-45 minutes of cooking, allowing enough time for the sugars to set without scorching.
Wood Choices
Hickory delivers that classic, robust smokehouse flavor that most people associate with traditional barbecue. It’s particularly effective with chicken because it penetrates the meat without overwhelming the natural poultry taste. Mesquite burns hotter and produces a more intense, almost earthy smoke that can become bitter if you’re not careful—use it sparingly or blend it with milder woods like oak. For a sweeter, fruitier profile, applewood and cherry wood create a subtle, almost bacon-like undertone that pairs exceptionally well with poultry. Pecan offers a middle ground with nutty notes that add complexity without dominating.
You’ll get the best results by matching your wood to your overall flavor strategy. Applewood works beautifully with maple-based glazes and herb rubs featuring sage or thyme. Hickory stands up to spicier rubs with cayenne, paprika, and black pepper. Many competition smokers blend woods to create signature profiles—a 60/40 mix of cherry and hickory produces a balanced smoke with both sweetness and depth. Plan on using about 3-4 chunks of wood for a 4-5 hour smoke, adding fresh chunks every 45-60 minutes during the first half of cooking when the chicken absorbs smoke most readily.
Marinades and Glazes
Buttermilk marinades tenderize the meat while adding tanginess that cuts through the richness of smoked chicken. Mix 2 cups of buttermilk with minced garlic, hot sauce, and fresh herbs, then submerge your chicken for 4-12 hours before smoking. The lactic acid in buttermilk breaks down proteins gently without turning the exterior mushy like more aggressive acids can. For an Asian-inspired profile, combine soy sauce, rice wine, ginger, and sesame oil for a marinade that creates a savory-sweet crust as it caramelizes during smoking.
Glazes add visual appeal and concentrated flavor in the final stretch of cooking. A classic Alabama white sauce—made with mayonnaise, apple cider vinegar, horseradish, and black pepper—gets brushed on during the last 30 minutes and creates a tangy, creamy coating that’s unexpected and delicious. Honey-bourbon glazes need careful attention since the sugars can burn quickly above 300°F; thin honey with bourbon, apple juice, or water to make it easier to brush on evenly. Carolina mustard glazes bring sharp, vinegary heat that balances the fatty skin perfectly.
Apply your glaze in thin layers rather than one thick coating for better adhesion and more controlled caramelization. Start with a light brush at the 30-minute mark, then add another layer every 10-15 minutes until you pull the chicken. This layering technique builds up a glossy, flavorful shell without creating a sticky mess that drips into your smoker and causes flare-ups. Keep your glaze warm in a small pot on the side of your smoker so it flows easily from the brush.

Serving Suggestions
Your beautifully smoked chicken deserves a presentation that matches its incredible flavor. Carve the bird at the table for maximum visual impact, starting by removing the legs and thighs, then slicing the breast meat against the grain into half-inch portions. The crispy, mahogany-colored skin should remain intact on each piece, as it carries concentrated smoky flavor that your guests will appreciate. For family-style serving, arrange the carved pieces on a large wooden board or platter, garnishing with fresh herbs like rosemary or thyme that complement the smoke profile.
Temperature matters just as much at serving time as it did during cooking. Let your chicken rest for 15-20 minutes after removing it from the smoker, which allows the juices to redistribute throughout the meat. This resting period prevents those flavorful juices from running out onto the cutting board when you carve. You can tent the chicken loosely with foil during this time, though the bark will stay crispier without it. Serve the chicken while it’s still warm but not piping hot—around 140-150°F is ideal for the best texture and flavor experience.
Accompaniments
Classic Southern sides pair exceptionally well with smoked chicken, creating a meal that feels both comforting and special. Creamy coleslaw provides a cool, crunchy contrast to the warm, tender meat, while baked beans seasoned with brown sugar and bacon echo the smoky notes. Cornbread serves as the perfect vehicle for soaking up any pan drippings or sauce, and potato salad—whether you prefer the mustard-based or mayo-based version—adds satisfying heft to the plate. Mac and cheese brings richness that balances the lean breast meat, and collard greens cooked with ham hock introduce a savory, slightly bitter element that cuts through the smokiness.
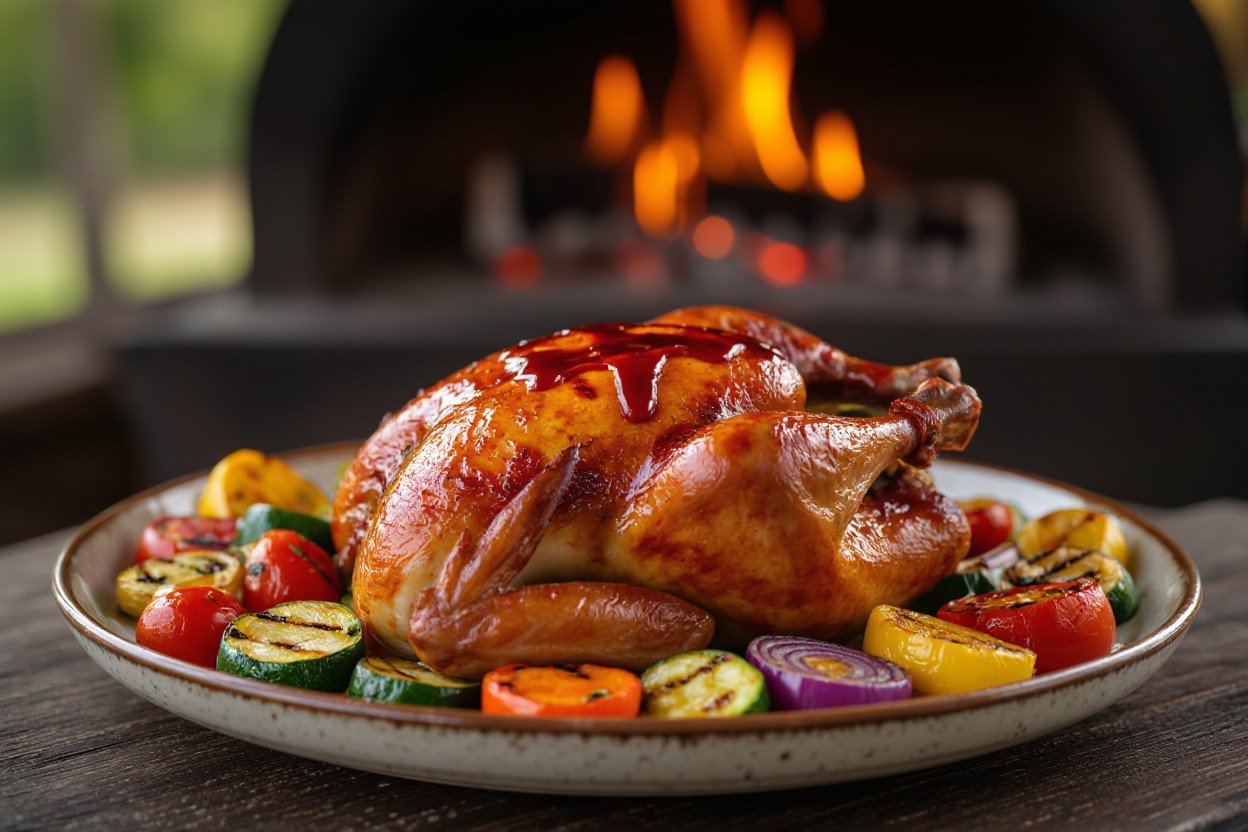
Lighter options work beautifully too, especially during warmer months when you’re smoking outdoors. Grilled vegetables like zucchini, bell peppers, and asparagus pick up complementary char flavors from your grill grates. A fresh garden salad with vinaigrette dressing refreshes the palate between bites of rich, smoky chicken. Corn on the cob, whether grilled or boiled, adds natural sweetness that plays well with the savory meat. For a modern twist, try serving sliced smoked chicken over a grain bowl with quinoa, roasted sweet potatoes, and a tahini drizzle—this combination transforms your traditional barbecue into something unexpectedly sophisticated.
Storage Tips
Proper storage begins the moment your chicken finishes resting. Remove all the meat from the bones while it’s still slightly warm, as this task becomes more difficult once the chicken cools completely. Separate white meat from dark meat during this process, since they have different moisture levels and reheating requirements. Place the carved meat in airtight containers or heavy-duty freezer bags, pressing out as much air as possible to prevent oxidation and freezer burn.
- Refrigerate smoked chicken within two hours of removing it from the smoker
- Store properly wrapped chicken in the coldest part of your refrigerator for 3-4 days
- Freeze portions in meal-sized quantities for up to 3 months
- Label containers with the date and type of wood used for smoking
- Though the skin stays crispy initially, you’ll find it softens during storage and reheating
Reheating your smoked chicken requires a gentle approach to preserve its moisture and texture. Your oven set to 325°F works better than a microwave, which tends to create rubbery meat and steamed-tasting skin. Place the chicken pieces in a baking dish with a tablespoon of chicken broth or water, cover tightly with foil, and heat for 15-20 minutes until the internal temperature reaches 165°F. For frozen chicken, thaw it overnight in the refrigerator rather than using quick-thaw methods that compromise texture. The meat makes excellent additions to salads, sandwiches, tacos, and pasta dishes throughout the week, giving you multiple meals from one smoking session.
Summing up
On the whole, smoking a whole chicken delivers an exceptional combination of flavor, tenderness, and visual appeal that you simply can’t achieve through conventional cooking methods. When you take the time to properly prepare your bird with the right rub, maintain consistent temperatures between 225-250°F, and allow the smoke to work its magic for 3-4 hours, you’ll create a centerpiece dish that impresses every time. Your patience will be rewarded with juicy meat infused with rich, smoky flavors and skin that achieves that coveted golden-brown color.
As you develop your smoking technique, you’ll discover that this method offers you tremendous flexibility in terms of wood choices, seasoning combinations, and flavor profiles. Whether you prefer the mild sweetness of apple wood or the robust character of hickory, you have complete control over the final result. Your success depends on monitoring internal temperatures, managing your smoker’s heat, and giving yourself adequate time for the process. Once you master these fundamentals, smoked whole chicken becomes an accessible yet impressive addition to your culinary repertoire that you can confidently prepare for family dinners or special gatherings.