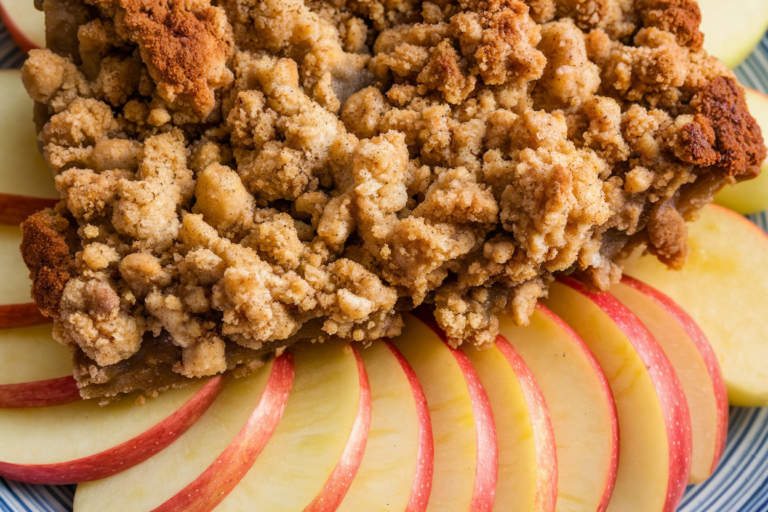
Keto Cauliflower Pizza Crust
Just because you’re following a low-carb lifestyle doesn’t mean you must sacrifice flavor; this cauliflower-based pizza crust offers a tender, crisp base that keeps net carbs low while delivering familiar pizza textures. You’ll learn practical steps, ingredient tips, and baking techniques to make a reliable, repeatable crust for your favorite toppings.
Understanding the Keto Diet
When you shift into nutritional ketosis your body switches from burning glucose to burning fat for fuel, producing beta-hydroxybutyrate and acetoacetate as measurable ketones; most lab definitions put nutritional ketosis around 0.5-3.0 mmol/L of blood ketones. In practice you aim to limit digestible carbohydrates so your liver increases ketone production, and that metabolic change is what makes cauliflower-based substitutions effective because cauliflower provides very few net carbs per cup (about 3 g net carbs in a cup of raw florets).
Adapting to this metabolic state usually brings rapid changes: many people lose 0.5-1.0 kg per week early on as glycogen and water are depleted, then a steadier fat loss follows. You’ll also need to watch electrolytes and protein intake-adequate sodium, potassium, and magnesium reduce common side effects during the first 1-3 weeks of adaptation, while keeping protein moderate (roughly 1.2-1.7 g/kg body weight for active adults) helps maintain lean mass without knocking you out of ketosis.
What is the Keto Diet?
The ketogenic diet is a high-fat, moderate-protein, very-low-carbohydrate approach designed to force the body into ketosis; typical macronutrient targets are about 70-75% fat, 20-25% protein, and 5-10% carbohydrates. You generally target 20-50 grams of total carbs per day to enter and sustain nutritional ketosis, although highly active individuals or those using targeted-carb strategies may tolerate slightly higher amounts.
In practical terms that means building meals around fatty proteins and low-carb vegetables-cauliflower is a common base because one cup yields only ~3 g net carbs and can be riced or puréed to replace flour-heavy ingredients. You’ll find it useful to track both carbs and ketone responses for the first few weeks so you can fine-tune portions: for example, switching a standard pizza base (30-40 g carbs) for a cauliflower crust drops the carbohydrate load dramatically, making it easier for you to stay below your daily target.
Benefits of the Keto Diet
For weight loss the keto approach often produces faster short-term reductions than low-fat diets in randomized trials over 3-6 months, partly because lower insulin levels and greater satiety from fats reduce overall calorie intake; many people report initial losses of 1-4 kg in the first month. Metabolically, you can expect lower fasting glucose and improved insulin sensitivity-clinical studies in people with type 2 diabetes report average HbA1c reductions on the order of 0.6-1.0 percentage points over 6-12 months, with some participants able to reduce diabetes medications under supervision.
Cardiometabolic markers also tend to shift: triglycerides commonly fall and HDL cholesterol often rises, while LDL responses vary between individuals and should be monitored. Neurologically, the diet has a long-established therapeutic role-pediatric epilepsy studies show substantial seizure reductions (often >50% in responsive cases), which is why the ketogenic framework remains medically validated beyond weight loss.
Keep in mind the benefits are individual: while many see improved blood lipids and glycemic control, others experience LDL increases or struggle with adherence; you should monitor labs (lipid panel, fasting glucose, electrolytes, and kidney function if on medications) and adjust fat sources toward monounsaturated and polyunsaturated fats, include fiber-rich low-carb vegetables, and consult your clinician to optimize outcomes for your specific health profile.
Ingredients for Cauliflower Pizza Crust
Essential Ingredients
You’ll want 2 cups riced cauliflower (about 200-240 g cooked and well-drained) as the base, 1 large egg (or 2 if you prefer a firmer, more cohesive crust), and 1/2 cup shredded mozzarella (roughly 50-60 g) to bind and add structure. Add 1/4 cup finely grated Parmesan (≈25 g) for flavor, plus 1/3 cup almond flour (30-40 g) to absorb moisture; season with 1/2 teaspoon salt, 1/2 teaspoon garlic powder, and 1 teaspoon Italian seasoning for a balanced savory profile. When you squeeze the cooked cauliflower, expect to remove 1/4-1/3 cup (60-80 mL) of water – getting this moisture out is how you achieve a crisp edge instead of a soggy center.
If you use frozen pre-riced cauliflower, thaw and press out excess liquid thoroughly before measuring; frozen heads often release more water than fresh. For baking, press the dough into a thin 9-10 inch (23-25 cm) circle on parchment, then bake at 425°F (220°C) for 12-15 minutes until golden; flipping and re-baking for 3-5 minutes can improve browning. Substitutions work: swap 1/3 cup almond flour for 2 tablespoons coconut flour (start small), or add 1-2 teaspoons psyllium husk for chewiness, but adjust eggs and dry ingredients accordingly.
Optional Add-ins
You can customize texture and flavor with small, measured add-ins: fold in 2 tablespoons chopped fresh basil or oregano, 1-2 tablespoons finely chopped sun-dried tomatoes (in oil, drained), or 2 tablespoons minced olives for a Mediterranean twist. For a protein boost, mix in 2-3 tablespoons cooked, crumbled bacon or 12-15 thinly sliced pepperoni pieces; for greens, stir in 1/4 cup cooked, tightly squeezed spinach. Keep add-in volumes low so they don’t reintroduce excess moisture – aim for no more than 1/3 cup total of high-moisture items.
Texture-focused add-ins include 1-2 tablespoons ground flaxseed or chia for a nuttier bite and extra fiber, or 1-2 tablespoons sesame or sunflower seeds for crunch; these will also modestly increase calories and fat but add structure. To make a cheesier, sturdier crust, increase shredded mozzarella to 3/4 cup (≈75-90 g) and use 2 eggs – many home cooks find that combo holds up better under heavy toppings.
When you add watery ingredients like mushrooms or spinach, always squeeze them dry and compensate by adding an extra tablespoon of almond flour or a single additional egg to maintain dough consistency; otherwise the crust will spread and stay soft. Note that some add-ins change net carbs: 2 tablespoons sun-dried tomato pieces add roughly 2-4 g net carbs, while 1-2 tablespoons ground flax add negligible net carbs and boost fiber, so plan toppings with your target macros in mind.
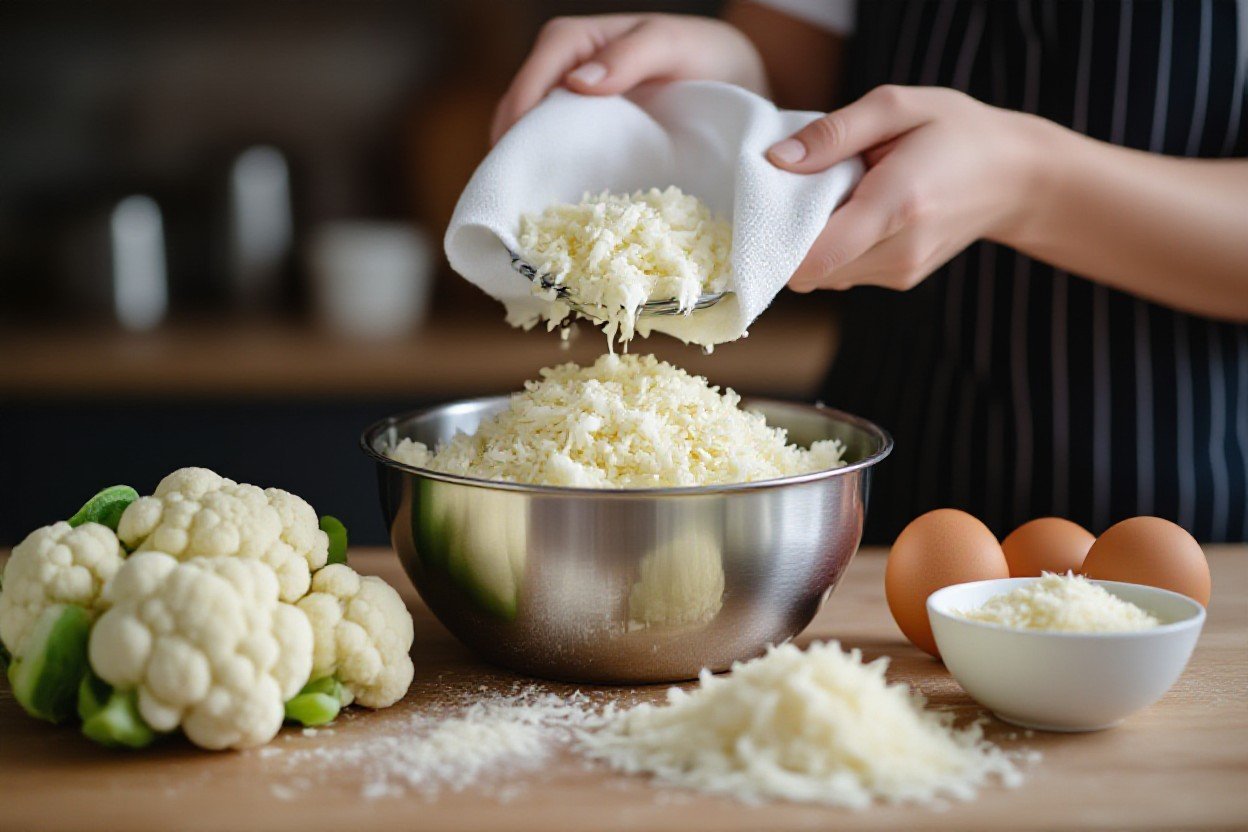
Preparing the Cauliflower
Pick a dense head of cauliflower that feels heavy for its size – a medium head around 600-700 g typically yields roughly 4 cups of riced cauliflower, which is enough for a 10-12 inch crust when cooked and squeezed. Break the head into florets and trim away any tough stems; larger stem pieces will overwork your food processor and create uneven texture.
Work methodically so the riced cauliflower stays dry and workable: pulse in batches rather than stuffing the processor, and dry the riced product thoroughly before combining with binder ingredients. If you skip small, consistent batches you’ll end up with some pieces overprocessed into mush while others stay too large to form a cohesive crust.
Ricing the Cauliflower
If you use a food processor, pulse in 1-2 second bursts until granules resemble rice – overprocessing leads to a pasty consistency that won’t bind well. For manual ricing, run florets across the medium holes of a box grater; it’s slower but gives you better control over piece size and prevents warming the cauliflower from friction.
Measure as you go: about 3 cups of raw riced cauliflower is the typical starting point for most keto crust recipes, and after cooking and squeezing you should expect less volume. Use that target to know when you have enough riced cauliflower for a single crust rather than guessing by eye.
Cooking Techniques
Microwaving, steaming, roasting and sautéing all work to remove moisture, but they change flavor and texture differently. Microwaving 3 cups of riced cauliflower in a covered bowl for 4-6 minutes on high softens it quickly and keeps a neutral taste; steaming takes 6-8 minutes and preserves a slightly firmer bite, while roasting at 400°F (200°C) for 12-15 minutes on a rimmed sheet concentrates flavor and gives a nuttier, more golden result.
When time is tight, microwaving is fastest; if you want depth of flavor, roast the riced cauliflower in a single layer until the edges brown. After cooking, transfer the rice to a clean kitchen towel or several layers of cheesecloth and squeeze firmly – from 3-4 cups riced you can expect to extract roughly 1/2 to 1 cup of liquid, which makes the difference between a sturdy crust and a soggy one.
Texture is the key test: the squeezed cooked cauliflower should feel like damp sand and hold together when pressed into a ball. If it still feels wet, return it to the oven on a lined sheet at 425°F (220°C) for 6-10 minutes to dry further before mixing with egg and cheese; typical binding ratios to start with are about 3 cups squeezed riced cauliflower to 1 large egg and 1/2 cup grated cheese (or 1/4 cup almond flour) so you can adjust for moisture and desired crispness.
Making the Pizza Crust
Work quickly once your cauliflower is cooked and drained so the mixture doesn’t absorb extra moisture; excess water is the main reason the base turns soggy. Aim for a dough you can press and shape-about 1/8-1/4 inch (3-6 mm) thickness for a 9-10 inch pie will give you a crisp edge and a tender center, and it typically yields one medium or two small crusts depending on how thin you press.
Use a flat surface lined with parchment or a lightly oiled silicone mat to shape the crust, and keep a small bowl of water nearby to smooth edges without adding moisture to the dough itself. If you want a firmer crust for plenty of toppings, increase the cheese by 15-25% or add another egg white to improve binding and shrinkage resistance during baking.
Mixing the Ingredients
Start with 2 cups riced cauliflower (about 200-250 g cooked and drained), squeeze it dry in a fine-mesh sieve or cheesecloth for 30-60 seconds until you have a dense, non-dripping mass, then combine it with 1 large egg, 1 cup shredded mozzarella (100-113 g), 1/4 cup grated Parmesan (≈25 g) and 1/4 cup almond flour (≈28 g). Add 1 tsp dried oregano, 1/2 tsp garlic powder and 1/4 tsp salt for a balanced savory profile; mix until uniform and test by forming a small patty that holds together.
If the mixture feels too wet after the first squeeze, compress it again for another 15-30 seconds or add 1-2 tablespoons more almond flour; conversely, if it’s crumbly, a tablespoon of water or a beaten egg white will help bind without making it heavy. When you press the dough on parchment, aim for even thickness and a slightly raised rim so toppings don’t spill-this small shaping step affects bake time and final texture more than most people expect.
Baking the Crust
Preheat your oven to 425°F (220°C) and position a rack in the middle, or use a preheated pizza stone/steel for the crispiest bottom; place the parchment with the shaped crust on a baking sheet if you don’t have a stone. Bake the plain crust for 12-15 minutes until the edges are golden and the center is set-rotate the pan halfway to ensure even browning and avoid hot spots that can over-brown one side.
After the initial bake, add light toppings (for example, 1/3 cup tomato sauce and about 3/4 cup shredded mozzarella) to prevent excess moisture from softening the base; return the pizza to the oven for another 6-8 minutes, or until the cheese bubbles and edges deepen in color. Total bake time normally runs 18-23 minutes; thicker crusts need an extra 4-6 minutes at the same temperature.
To get an extra-crisp bottom, move the pizza to the lower third of the oven for the last 3-4 minutes or increase heat to 450°F (232°C) for those final minutes, or broil for 1-2 minutes while watching closely; letting the finished pizza rest on a wire rack for 3-5 minutes before slicing also keeps the base from steaming and becoming soggy. For storage, fully bake the crust, cool completely, and freeze flat for up to one month-reheat at 400°F (204°C) for 6-8 minutes before adding fresh toppings.
Topping Suggestions
Keto-Friendly Toppings
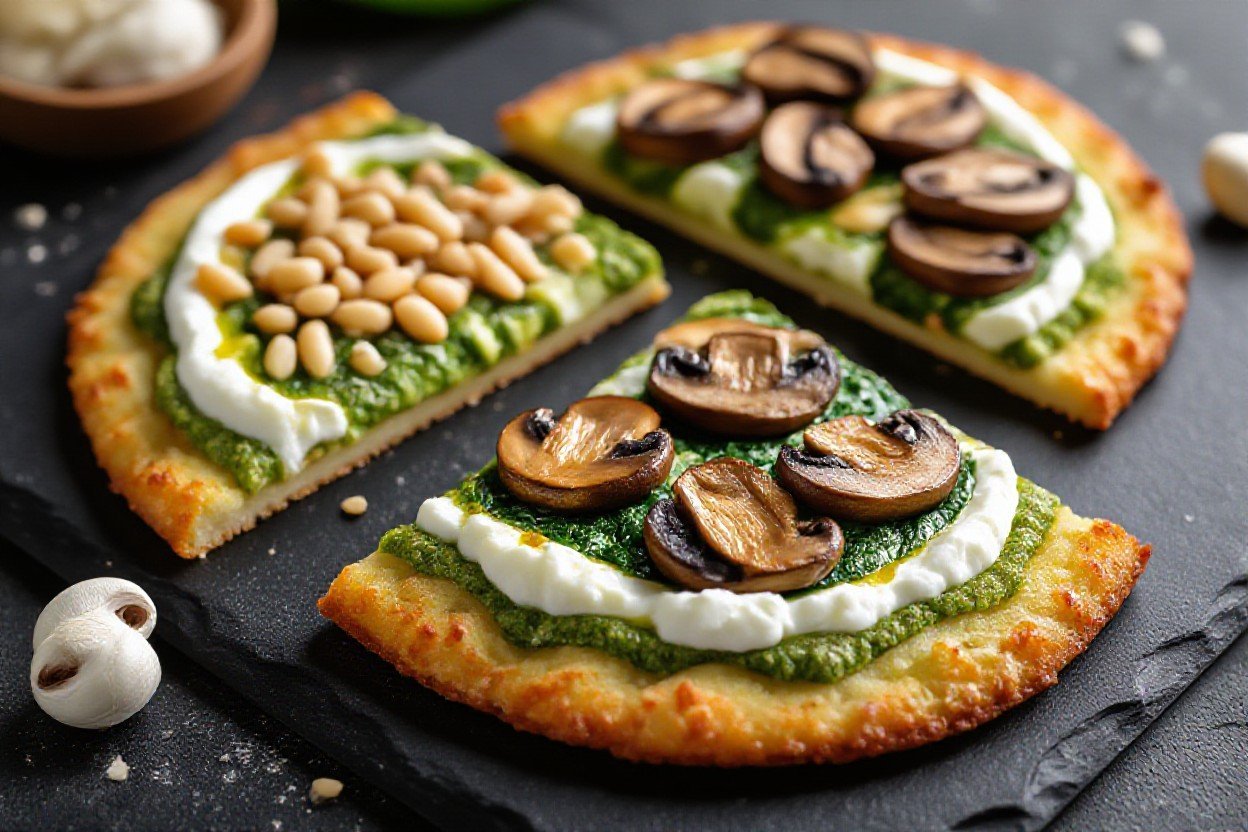
You can load the crust with high-fat, low-carb proteins like sliced pepperoni, crumbled Italian sausage, shredded rotisserie chicken, or paper-thin prosciutto; most cured meats contribute roughly 0-2 g net carbs per ounce, so they’re reliable choices for staying under your daily carb target. Veggies that hold up without adding much moisture include baby spinach, arugula, sautéed mushrooms, thin zucchini ribbons and sliced olives-use a heaping cup of greens or roughly 1/2 cup cooked mushrooms per pizza to add bulk without blowing your carbs.
Manage wet toppings by pre-cooking or draining: sauté sliced mushrooms for 4-6 minutes to concentrate flavor, or salt and squeeze zucchini ribbons for 5-10 minutes to remove water before topping. For concentrated flavor with minimal carbs, add small amounts of marinated artichoke hearts, roasted red peppers (use sparingly-about 1-2 tbsp per pizza), and anchovies or capers as salt-forward accents that let you use less cheese while maintaining depth.
Cheese and Sauce Options
Choose cheeses that melt well and pack flavor: shredded part-skim or whole-milk mozzarella (about 1/2 cup per 9-10″ pizza) gives classic stretch, while grated Parmesan or Pecorino (1-2 tablespoons) adds sharpness without bulk. Soft cheeses like goat cheese or ricotta work as dollops-use 2 tablespoons of ricotta in spots rather than spreading it to keep your carb load low. For sauce, pick a no-sugar-added tomato sauce or passata and apply about 1/4 cup for a 10″ pie; alternatively, oil-based bases like garlic-infused olive oil or basil pesto (watch nut content-1 tablespoon pesto has ~1-2 g net carbs) keep carbs down and heighten richness.
If you prefer a Margherita-style pie, use 4-5 oz fresh mozzarella sliced thin and blot excess moisture before placing on the crust, then spoon 1/4 cup of drained crushed tomatoes seasoned with salt and oregano-baking will concentrate flavors without sogginess. Finish with 1 tablespoon grated Parmesan and a handful of fresh basil after baking; small finishing touches like 1 tsp chili oil or a sprinkle of red pepper flakes elevate taste while adding negligible carbs.
Serving and Storing
How to Serve
After baking, let the pizza rest 4-6 minutes so the cauliflower base firms and the cheese sets; this makes slicing cleaner and prevents toppings from sliding. A 10-inch crust typically yields 6 generous slices – plan on 1-2 slices per person for a main course, or cut into 8 smaller pieces for appetizers. For extra crispness, transfer the finished pizza to a preheated pizza stone or cast-iron skillet for 1-2 minutes before slicing.
Top combinations that play well with the cauliflower texture include: 1/2 cup shredded mozzarella and 10-12 pepperoni slices for a classic, 2 tbsp pesto with 1 oz crumbled goat cheese and a handful of arugula for a fresh bite, or 3 oz cooked chicken, 1/4 cup ricotta dollops and roasted red peppers for a heartier option. Finish each slice with 1 tsp olive oil or a sprinkle of fresh herbs (basil, oregano) and 1/4 tsp red pepper flakes to boost flavor without adding carbs.
Storing Leftovers
Let leftovers cool to room temperature no more than 2 hours, then store in an airtight container or wrap tightly in plastic wrap and foil. Refrigerate for up to 3-4 days; if you want longer storage, freeze slices for up to 1 month for best texture. When stacking slices in the freezer, separate them with parchment paper to prevent sticking and label the package with the date.
Reheat refrigerated slices on a baking sheet in a preheated oven at 375°F (190°C) for 8-12 minutes to regain crispness, or warm in a skillet over medium heat for 3-5 minutes per side. If you must use a microwave, heat briefly and then finish in a hot skillet or oven to avoid a soggy crust. For frozen slices, either thaw overnight in the fridge and reheat at 425°F (220°C) for 8-10 minutes, or bake from frozen at 400°F (200°C) for 12-15 minutes, covering with foil for the first portion of cooking to prevent topping burn.
For meal prep, portion single slices into individual airtight containers so you can reheat only what you need; adding a paper towel under the slice in the container helps absorb excess moisture and preserves a firmer crust. Vacuum-sealing can extend freezer life to about 3 months but may slightly soften the texture, so expect the best crispness when you reheat at higher oven temperatures or in a toaster oven for 3-5 minutes at 375-400°F.
To wrap up
With these considerations, you can make a reliably crisp and flavorful keto cauliflower pizza crust by removing as much moisture from the riced cauliflower as possible, using a firm binder such as egg and grated cheese or a small amount of almond flour, and pre-baking the pressed crust on parchment until golden to set texture. Press the crust thin for extra crispness or slightly thicker for a chewier base, season the dough well, and avoid overloading with wet toppings that will soften it during baking.
To maintain quality, cool the crust briefly before adding toppings, bake on a hot sheet or pizza stone, and store leftovers wrapped in the refrigerator or frozen flat for quick reheats; a short re-crisp under a broiler or in a hot oven restores texture. By controlling moisture, binding, and baking time you’ll consistently hit your desired texture and nutrition targets while keeping your keto meals varied and satisfying.