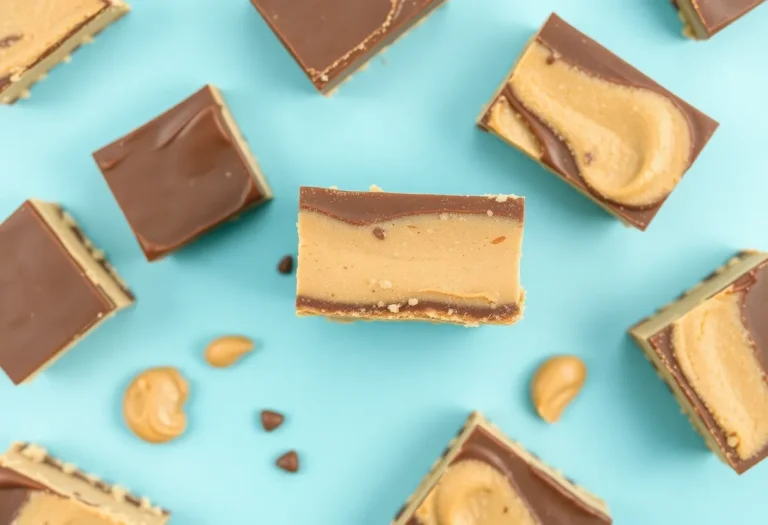
No-Bake Keto Peanut Butter Bars
Just because you ditched sugar-loaded desserts doesn’t mean you have to ditch that peanut buttery goodness you crave. With these no-bake keto peanut butter bars, you’re basically getting candy-bar vibes without wrecking your carbs, and you don’t even have to turn on the oven, which is a win on busy nights.
You’ll mix simple low-carb ingredients, chill the whole thing, and slice it into bars that actually feel like a real treat – not some sad “diet” snack. And the best part… you stay in control of your macros while still satisfying that sweet tooth.
Key Takeaways:
- Unlike store-bought keto bars that taste kinda fake-sweet, these no-bake peanut butter bars hit that classic peanut butter cup vibe but with way fewer carbs – you mix simple stuff like natural peanut butter, almond flour, and a sugar-free sweetener, press it in a pan, then top with melted low-carb chocolate. No oven, no drama, and they set up in the fridge so you can make them ahead for the week without babysitting anything.
- Instead of juggling 20 ingredients like some fancy keto desserts, this recipe stays super flexible – you can tweak the sweetness, use crunchy or creamy peanut butter, add a little vanilla, even sprinkle flaky salt on top if you want that sweet-salty thing. It’s one of those “use what you’ve got” treats that still feels special enough to bring to a get-together and not scream diet food at all.
- Compared to snacks that spike your blood sugar and leave you ravenous an hour later, these bars are high in fat and pretty filling, so they work as a legit dessert or a quick grab-and-go snack when you’re craving something rich. Just cut them into smaller squares if you’re watching macros, stash them in the fridge or freezer, and you’ve basically got built-in portion control without feeling like you’re punishing yourself.
What’s So Great About No-Bake Keto Peanut Butter Bars?
They Hit Your Cravings Without Wrecking Your Macros
You get that peanut butter cup satisfaction without the sugar crash, which is kinda wild when you realize each bar can sit around 3 to 4 net carbs if you portion them into 16 squares. Instead of loading up on 20+ grams of sugar like a regular candy bar, you’re pulling flavor from real peanut butter, a keto-friendly sweetener, and just enough chocolate on top to make your brain go, yep, this is dessert. And since there’s no flour or oats hiding in the base, your carbs stay low while the fat from peanut butter and butter does the heavy lifting for satiety.
What really matters here is how they keep you full way longer than some airy protein bar ever could. You’re looking at a nice mix of fat and a bit of protein that actually sticks with you, so one square with a coffee can easily replace that mid-afternoon vending machine raid. Plus, because you’re making them at home, you control everything – you choose the sweetener, the peanut butter (no sugar added, of course), even how thick you want that chocolate layer, so the macros fit your exact goals instead of the other way around.
They’re Stupidly Easy, Crazy Versatile, And Perfect For Real Life
What catches most people off guard is how fast these go from mixing bowl to fridge – you’re talking 10 to 15 minutes of hands-on time, no oven, no fancy equipment, just a bowl, a spatula, and a pan. If you can stir peanut butter, you can make these. They set up in the fridge in about an hour, and after that you’ve basically got a pan of built-in portion control sitting there waiting whenever the snack monster hits. For meal prep, that’s gold, because you batch once and snack smart all week.
Then there’s the tweakability, which is where these really shine in your everyday routine. Want higher protein? Stir in a scoop or two of unsweetened whey or collagen and you’ve turned them into legit post-workout bites. Need dairy-free? Swap butter for coconut oil and use a dairy-free chocolate, easy. You can even change the vibe completely with a handful of chopped peanuts for crunch, a sprinkle of flaky salt on top, or a swirl of sugar-free strawberry jam so it feels like a PB&J bar. Same basic recipe, tons of variations, zero extra kitchen drama.
The Ingredients You’ll Need (And Why They Matter)
Choosing the Right Peanut Butter
You feel it first in the texture, so peanut butter is where everything either works beautifully or falls flat. You want a jar that lists basically two things: peanuts and salt. Once brands start adding sugar, corn syrup, or weird hydrogenated oils, you’re not only bumping the carbs up, you’re also risking that greasy, crumbly bar that won’t hold together. Natural peanut butter with around 2 net carbs per 2-tablespoon serving is the sweet spot for most people tracking macros.
Chunky vs creamy? If you want that classic candy-bar vibe, go creamy – it gives you that smooth, fudge-like bite. If you like a bit of crunch, you can use chunky, but plan for slightly looser bars unless you pack them really tight in the pan. Stir your peanut butter well before measuring too, because separated oil on top will throw off the ratio and you’ll end up chasing it with extra almond flour trying to fix it.
Low-Carb Sweeteners, Fats, And The “Base”
On the sweetness side, you’re aiming for that peanut butter cup taste without the weird cooling afterburn. Granulated erythritol or a blend like erythritol-monk fruit works great in the base because it gives you body, but for the chocolate topping a powdered sweetener melts and sets smoother. If you’ve ever had a topping that looked gritty or sandy, 9 times out of 10 it was from using only granulated sweetener in the melted chocolate. A simple swap to powdered fixes that instantly.
Then you’ve got the supporting cast: almond flour, butter, and chocolate. Almond flour acts like your “cookie” layer, soaking up the fats while keeping carbs low (2 grams net per 2 tablespoons is common), and it helps the bars slice clean instead of oozing. Butter (or coconut oil if you’re dairy-free) boosts fat for satiety and keeps everything rich enough that one bar actually feels like a treat, not diet food. For the topping, a 70% or higher sugar-free chocolate bar or chips gives you that snap when chilled, and if you add just a teaspoon or two of coconut oil, you get a glossy layer that cuts like a dream instead of shattering all over your cutting board.
My Step-by-Step Guide to Making These Bars
Step-by-Step Breakdown
| Step | What You Actually Do |
|---|---|
|
A lot of people think you can just toss peanut butter and sweetener in a pan and call it a bar, but if you want that legit candy-bar texture, you’ve got to layer it properly. You’ll start by lining an 8×8 inch pan with parchment, letting the paper hang over the sides so you can lift everything out later without fighting it. Then you mix your base: about 1 cup natural peanut butter (no sugar added), 1/2 cup melted butter or coconut oil, 1/3 to 1/2 cup powdered erythritol or your fave keto blend, plus a heaping 1 1/2 cups superfine almond flour so the mixture firms up instead of staying gloopy. |
Once that base looks like a thick cookie dough, you press it firmly into the pan with the back of a spoon or your fingers, really packing it into the corners so you don’t get weird thin spots later. You want it level, about 3/4 inch thick, because that’s what gives you that peanut-butter-cup bite when you add the chocolate. At this point the pan goes into the freezer for at least 15-20 minutes so the bottom layer sets up solid – if you skip that, your chocolate layer will sink and you’ll end up with marbled chaos instead of clean layers. |
Chocolate Layer & Finishing Touches
| Step | What You Actually Do |
|---|---|
|
Most people assume you need fancy chocolate chips to keep things keto, but you can totally work with a 3.5 ounce bar of 85% dark chocolate plus a tablespoon of butter or coconut oil to keep carbs in check. You gently melt it using a double-boiler setup or 20-second microwave bursts, stirring until it’s glossy and smooth, then taste a tiny bit and, if you like it sweeter, whisk in 1-2 teaspoons powdered sweetener so it doesn’t get grainy. Once your peanut butter base is chilled and firm to the touch, you pour that melted chocolate over the top and tilt the pan around so it spreads into a thin, even blanket. |
After you’ve smoothed the top with a spatula, you can get a little fancy: sprinkle flaky sea salt, crushed roasted peanuts, or even a pinch of espresso powder if you want a deeper chocolate vibe. Then the whole thing goes back into the fridge for about 45-60 minutes (or the freezer for 20-25 if you’re impatient) until the chocolate is set and the bars slice cleanly. For neat edges, run a knife under hot water, wipe it dry, then cut into 16 bars – that keeps each piece around 2-3 net carbs depending on your ingredients, which means you get that candy bar feel without blowing your carbs for the day. |

Tips for the Perfect No-Bake Bars (Seriously, Don’t Skip This)
Texture, Thickness, And Getting The Base Just Right
Picture this: you cut into the pan and the base crumbles into sad little piles instead of clean squares… yeah, you don’t want that. You’re aiming for a firm, slightly fudgy texture, so if your peanut butter is super drippy, you’ll need a bit more almond flour or coconut flour to balance it out – start with 1 extra tablespoon at a time and stop the second the mixture holds together when you press it with a spoon. Press the mixture into the pan like you mean it, using the bottom of a glass or measuring cup, and really pack it down into the corners so it chills into one solid layer, not a loose crumble.
On thickness, a 9×9 pan gives you that classic bar height, but if you only have an 8×8, you’re looking at slightly thicker, richer bars, so you may want to cut them smaller – think 20 pieces instead of 16. If you feel the mixture tugging or cracking while you press it, that usually means it’s a bit dry, so you can gently knead in 1 to 2 teaspoons of melted butter or coconut oil until it smooths out. Any time you’re unsure, chill the base for 10 minutes, press it again, and you’ll instantly feel if you nailed the texture.
Sweetness, Chocolate Topping, And Clean Slices
As far as sweetness, your taste buds are not lying to you – different keto sweeteners really do hit differently in these bars. If you use erythritol, it can crystallize as it chills, so blending it into a fine powder first helps a ton, while allulose stays softer but can brown quicker if you ever freeze and thaw them. You can also split the difference: 50% powdered erythritol, 50% allulose gives you great sweetness without that cooling aftertaste, and you’ll notice the bars taste even better on day 2 once the flavors mellow out.
For the chocolate layer, don’t just dump melted chips on top and hope for the best, stir in 1 to 2 teaspoons of coconut oil per cup of chocolate chips so it slices without shattering and gives you that shiny top. Let the bars sit at room temp for 5 to 10 minutes before cutting, then use a sharp knife warmed under hot water and wiped dry between cuts so you get those bakery-style edges instead of jagged chunks.
- Press the base firmly into the pan for a compact, unified layer.
- Powder granulated keto sweeteners to avoid gritty texture.
- Add a little coconut oil to the chocolate for smoother slicing.
- Chill fully, then warm your knife for sharp, clean cuts.
Any leftover bars should be stored in an airtight container in the fridge so they stay firm, flavor-packed, and ready whenever your peanut butter cup craving hits.
How to Store and Enjoy These Delicious Treats
Storing Your Bars For Maximum Freshness
I’ll be straight with you, the first time I made these I thought they’d last the whole week… they were gone in two days, but the ones that survived held up beautifully in the fridge. You’ll get the best texture if you slice the bars, then store them in a single layer in an airtight container, or stack them with parchment between layers so the chocolate tops don’t fuse together. In the fridge, they stay firm but not rock hard, which is exactly what you want for that classic peanut butter cup bite.
In terms of timing, you’re looking at about 7 days of solid quality in the fridge, as long as your kitchen isn’t super hot and you keep the container tightly sealed. If you batch cook on weekends, you can also freeze them for longer storage: freeze the cut bars on a baking sheet for 1 to 2 hours, then transfer to a freezer bag and press out extra air. They’ll keep well for 1 to 2 months, and you can either thaw them in the fridge overnight or let them sit on the counter for 15 to 20 minutes for a slightly firmer, almost fudge-like texture.
Best Ways To Serve And Enjoy Your Bars
On a busy weekday morning, you can grab one of these straight from the fridge, pair it with coffee, and you’ve basically hacked breakfast with something that tastes like dessert but still fits your macros. Most people find one bar (about 2 x 2 inches) hits that sweet spot: roughly 3 to 4 net carbs depending on your sweetener and chocolate choice, plenty of fat to keep you full, and no weird blood sugar spike. If you like a softer bite, let your bar sit at room temp for 5 to 10 minutes so the peanut layer relaxes a bit and the chocolate loses that super sharp snap.
For a fun twist, you can chop a bar into small cubes and sprinkle it over a bowl of Greek-style yogurt or low-carb chia pudding, kind of like keto “granola” but with way more personality. Kids usually love them straight from the freezer as a cold treat, and if you’re hosting friends you can slice the bars into bite-size squares and serve them on a little board with berries and nuts so everyone can snack without feeling like they’re eating “diet food.” Whatever route you go, treat these like a flexible tool in your keto toolbox – dessert, snack, mini breakfast – you get to decide how they fit into your day.
Alternatives and Variations You Might Love
Over the last year or so, high protein desserts have basically taken over Instagram, so if you want to hop on that train you can swap part of the peanut butter for protein powder. Try replacing 2 tablespoons of peanut butter with 2 tablespoons of unflavored or vanilla whey isolate, then add 1-2 extra tablespoons of almond milk to keep the texture smooth – this bumps the protein without wrecking carbs. If peanuts don’t sit well with you, you can go full almond: use almond butter, a mix of almond flour plus coconut flour in the base (about 3/4 cup almond flour + 1/4 cup coconut flour), and top with a 70% cocoa dark chocolate for a more grown-up vibe.
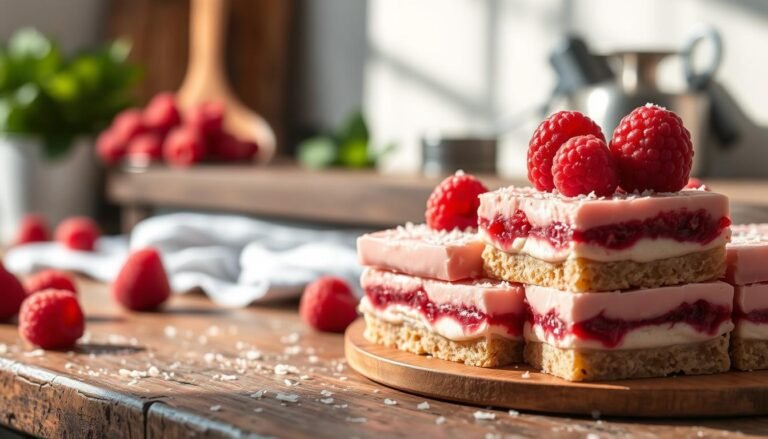
Peanut-free households can also play with seed butters, and they’re way better now than they were a few years ago. Sunflower seed butter gives you a similar richness but with a slightly earthy taste, so you might want an extra teaspoon of vanilla or a few drops of liquid stevia to balance it. For something fun, try a “PB&J” effect: swirl 2-3 tablespoons of your favorite sugar-free raspberry or strawberry jam into the peanut layer before chilling, then freeze for 20 minutes so the swirl sets and doesn’t muddy your chocolate topping.
Summing up
Drawing together one tasty fact, most keto dessert fans say peanut butter bars are the thing they reach for first when a sugar craving hits, and your no-bake version fits that sweet spot without wrecking your macros. You get that rich peanut flavor, a legit dessert vibe, and still keep your carbs in check, so you can feel pretty good about grabbing one from the fridge after dinner… or, you know, for breakfast sometimes. By dialing in your favorite nut butter, sweetener, and chocolate combo, you end up with a recipe that actually feels like yours, not something you copied and forgot about a week later.
Because these bars are no-bake and freezer-friendly, you’ve basically got a built-in backup plan for crazy busy days when you just want something quick that still lines up with your goals. You can slice them smaller for a light bite, or go bigger when you need something that feels more like a full-on treat, and that kind of flexibility is what keeps you consistent long-term with keto. In the end, if your dessert feels satisfying, simple to make, and easy to stash away for later, you’re way more likely to stay on track – and these no-bake keto peanut butter bars check every one of those boxes.