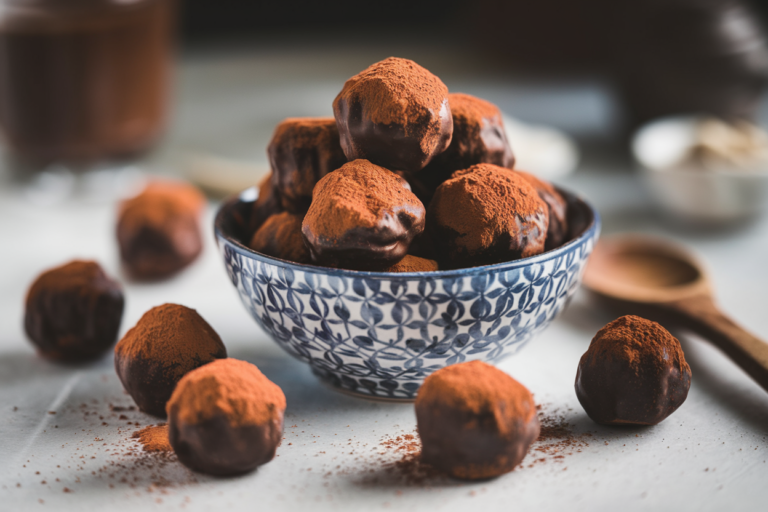
Chocolate Dipped Madeleines That Break the Internet: Crispy Edges, Velvety Chocolate, Zero Regrets
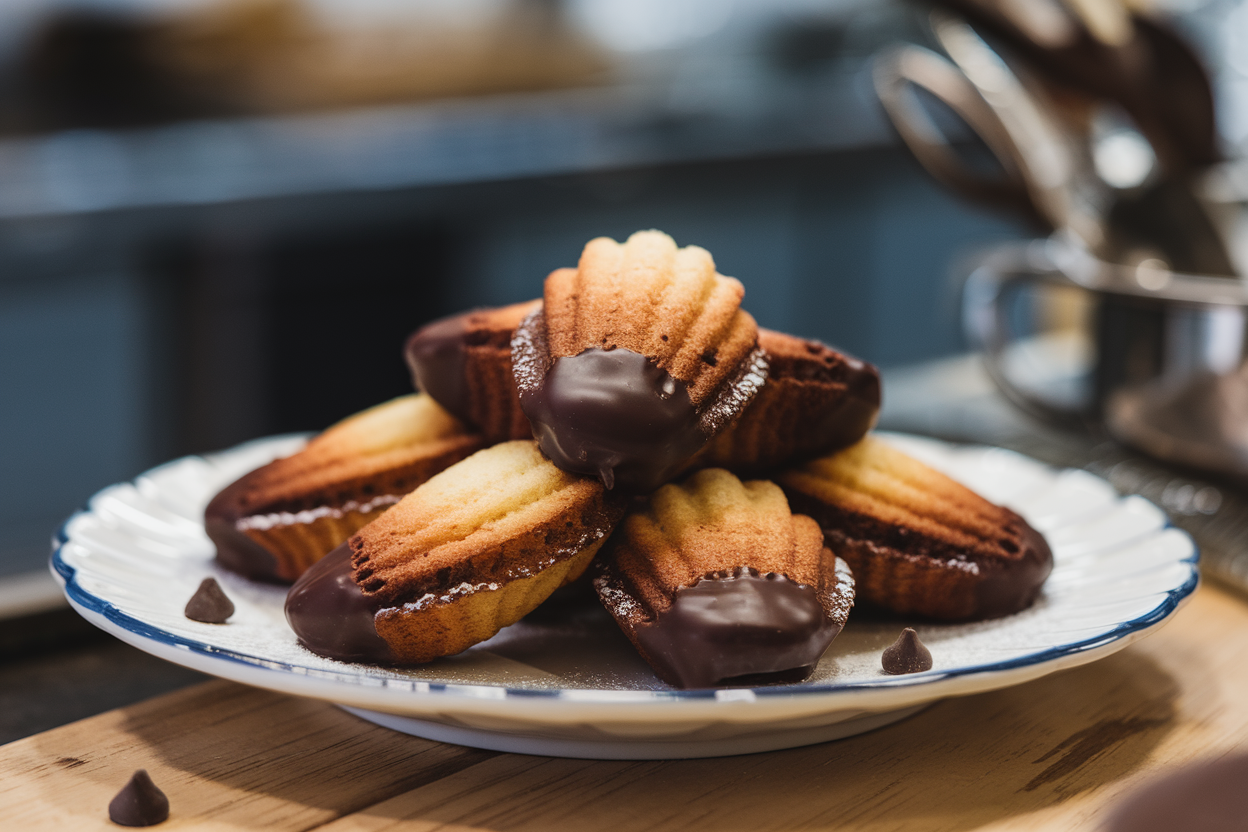
If you think French pastries are fussy, you haven’t met the madeleine that took a bath in chocolate and came out a star. These shell-shaped beauties go from simple to “can’t-stop-eating” with one strategic dip. They’re light, buttery, and dangerously snackable—like a mini cake and a cookie had a baby.
Expect golden edges, tender centers, and a glossy chocolate snap that makes them bakery-level legit. The best part? You’ll look like a pastry pro with a recipe that’s secretly easy.
What Makes This Recipe So Good
- Texture perfection: The madeleines bake up with slightly crisp edges and a soft, plush crumb.
The chocolate adds a silky snap for contrast.
- Fast and forgiving: Chill the batter, bake, dip—done. No laminating. No stress.
Just smart steps that deliver consistent results.
- Flavor that sings: Browned butter, vanilla, and a hint of lemon zest keep things bright and aromatic without overpowering the chocolate.
- Dessert or snack: Serve with coffee, tea, or a late-night kitchen raid. These are classy enough for guests and shameless enough for you.
- Customizable: From dark to milk to white chocolate, plus toppings, you can dial it to your mood and pantry.
Shopping List – Ingredients
- Unsalted butter – 10 tablespoons (140 g), plus extra for greasing the pan
- All-purpose flour – 1 cup (120 g), plus extra for dusting the pan
- Granulated sugar – 2/3 cup (135 g)
- Large eggs – 3, at room temperature
- Vanilla extract – 1 1/2 teaspoons
- Lemon zest – from 1/2 lemon (optional but excellent)
- Baking powder – 1 teaspoon
- Fine sea salt – 1/4 teaspoon
- Dark or semi-sweet chocolate – 6 to 8 oz (170–225 g), chopped or chips
- Neutral oil or cocoa butter – 1 to 2 teaspoons (for a smoother chocolate dip, optional)
- Optional toppings: flaky sea salt, chopped pistachios, toasted coconut, or sprinkles
How to Make It – Instructions
- Brown the butter: Melt the butter in a small saucepan over medium heat. Cook until it foams, then turns golden with brown specks and a nutty aroma, 5–7 minutes.
Immediately transfer to a heatproof bowl to cool.
- Prepare the pan: Generously brush your madeleine pan with melted butter and dust with flour. Tap out excess. Chill the pan in the fridge to set the coating—this helps the hump and the release.
- Whisk the dry ingredients: In a bowl, whisk flour, baking powder, and salt.
Set aside.
- Beat the eggs and sugar: In a separate bowl, beat eggs and sugar with a hand mixer or stand mixer on medium-high until pale, thick, and ribbony, about 4–5 minutes.
- Flavor it up: Beat in vanilla and lemon zest. Don’t overthink it—just blend until smooth.
- Fold in the dry: Sift the dry mixture over the egg mixture. Gently fold with a spatula until just combined.
No streaks, no overmixing.
- Add the butter: Stir a spoonful of batter into the cooled brown butter to loosen it, then gently fold the butter into the batter until incorporated.
- Chill the batter: Cover and refrigerate for at least 45 minutes (up to 24 hours). The chill creates that signature dome. Patience = hump.
- Preheat and portion: Heat oven to 375°F (190°C).
Scoop a rounded tablespoon of batter into each shell. Don’t spread; the heat will do the work.
- Bake: Bake 8–11 minutes until edges are golden and centers spring back. You want lightly browned rims and a proud little hump.
- Cool: Let rest 1 minute, then gently tap out onto a rack.
Cool completely before dipping. Warm madeleines melt chocolate… and your patience.
- Melt the chocolate: Microwave in 20–30 second bursts, stirring between, until smooth. Add a little neutral oil or cocoa butter for shine and dip-ability.
- Dip and decorate: Dip half of each madeleine into the chocolate.
Let excess drip. Lay on parchment and sprinkle toppings immediately if using.
- Set: Let chocolate set at room temp, or chill for 10–15 minutes if you’re in a hurry (aren’t we all?).
Storage Instructions
- Room temperature: Best within 24 hours. Store in an airtight container with parchment between layers to protect the chocolate.
- Refrigerator: Up to 3–4 days.
Flavor stays great; texture gets a bit firmer. Let come to room temp for peak tenderness.
- Freezer: Freeze plain madeleines (undipped) up to 2 months. Thaw, then dip in fresh chocolate.
Dipped ones can be frozen too, but the chocolate may bloom. Still tasty, just less glossy.
Benefits of This Recipe
- High reward, low effort: Minimal tools, major payoff. Professional look without professional drama.
- Scalable: Double the batter, keep it chilled, and bake in rounds for parties or gifting.
- Versatile flavor base: The browned butter and vanilla play well with citrus, spices, and any chocolate you love.
- Great make-ahead option: Batter rests in the fridge, so you can bake fresh on demand.
Warm kitchen, happy people.
- Built-in portion control: Bite-size treats that feel indulgent without committing to a giant slab. Unless you eat six—no judgment.
Avoid These Mistakes
- Skipping the chill: No chill, no hump. The rest time also improves texture and flavor.
Don’t rush greatness.
- Overmixing the batter: Gentle folds keep the crumb tender. Vigorous stirring equals toughness—hard pass.
- Greasing poorly: A well-buttered, lightly floured, chilled pan prevents sticking and gives definition. Nonstick spray alone can fail you, FYI.
- Overbaking: These go from perfect to dry fast.
Pull them when the edges are golden and centers spring back.
- Hot dipping: Let madeleines cool fully before dipping. Otherwise, the chocolate slides off like it owes you money.
Variations You Can Try
- Mocha Madeleines: Add 1 teaspoon instant espresso powder to the dry ingredients and dip in dark chocolate.
- Orange Almond: Swap lemon zest for orange zest and add 1/4 teaspoon almond extract. Garnish with candied orange peel.
- Matcha White Chocolate: Whisk 1 to 1 1/2 teaspoons matcha into the flour mix.
Dip in white chocolate and sprinkle sesame seeds.
- Hazelnut Crunch: Fold in 2 tablespoons finely ground toasted hazelnuts, dip in milk chocolate, and top with chopped hazelnuts.
- Coconut-Lime: Use lime zest and finish with toasted coconut on the chocolate.
- Gluten-Free: Use a cup-for-cup gluten-free blend that includes xanthan gum. Watch bake time; they may brown faster.
FAQ
Do I need a madeleine pan?
Yes. The classic shell shape and the signature hump come from that specific pan.
You can bake the batter in mini muffin tins in a pinch, but it becomes a different cookie-cake situation.
Why didn’t my madeleines get a hump?
Usually it’s one of three things: batter not chilled, oven not hot enough, or pan not cold. Also, overmixing can deflate the structure. Chill the batter, preheat fully, and keep the pan cold before filling.
Can I use brown sugar instead of granulated?
You can, but expect a denser crumb and more moisture.
Granulated sugar gives the classic light texture. If you swap, use half brown and half granulated for balance.
Which chocolate is best for dipping?
High-quality dark or semi-sweet chocolate with 55–70% cacao melts smoothly and sets with a good snap. For extra shine and firmness, add a teaspoon of neutral oil or temper the chocolate if you’re feeling fancy, IMO.
How do I prevent sticking?
Butter every groove thoroughly, dust with flour, tap out excess, and chill the pan.
Nonstick pans help, but don’t rely on them alone. Also, remove the madeleines 1 minute after baking before any steam re-glues them.
Can I make the batter ahead?
Absolutely. Refrigerate up to 24 hours.
The flavor deepens, and the rise improves. If the batter seems stiff, let it sit at room temp for 10 minutes before scooping.
What if I don’t want lemon?
Skip it or swap with orange zest, almond extract, or a touch of honey. The browned butter and vanilla can carry the show just fine.
How many does this make?
About 18 to 24 madeleines, depending on pan size and how generous your scoops are.
If you get 16, I’m not judging your “chef tax.”
The Bottom Line
Chocolate Dipped Madeleines are the ultimate flex: elegant enough for gifting, easy enough for a Tuesday. With a chilled batter, hot oven, and a quick dip in good chocolate, you’ll turn out bakery-level treats without breaking a sweat. Keep a batch of batter in the fridge, and you’re 10 minutes away from warm, golden shells any time.
Fancy? Yes. Fussy?
Not anymore.
Printable Recipe Card
Want just the essential recipe details without scrolling through the article? Get our printable recipe card with just the ingredients and instructions.