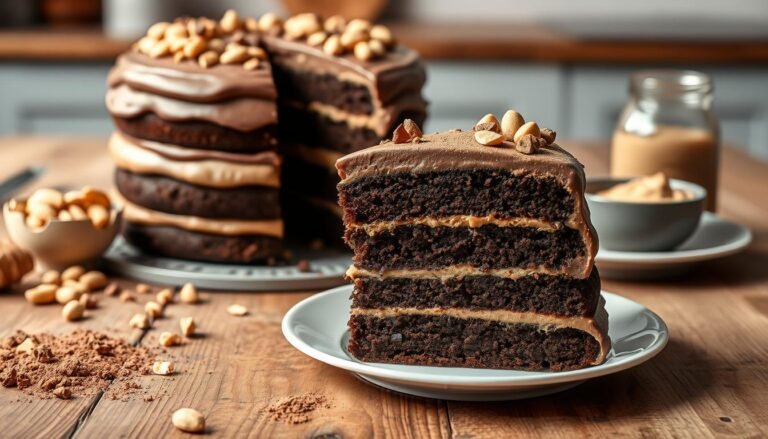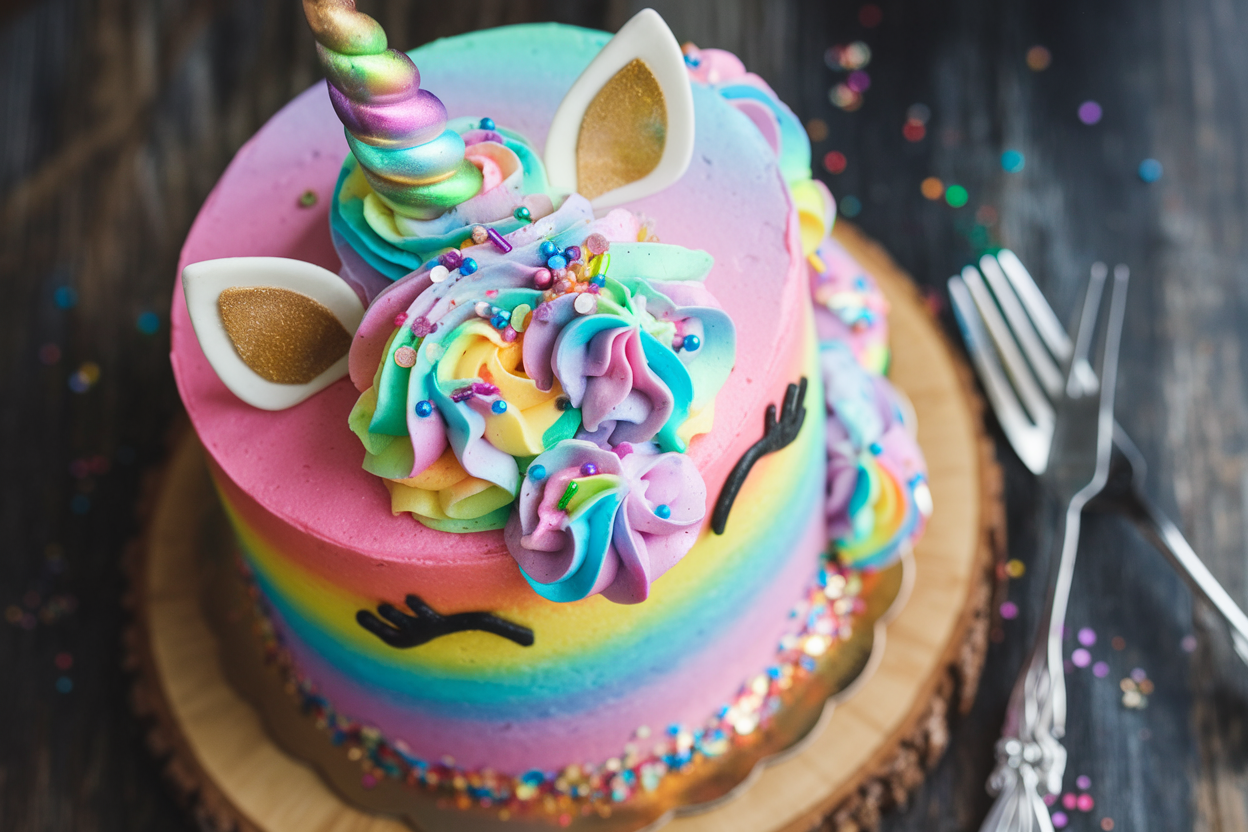
Rainbow Unicorn Cake: The Show-Stopping Party Trick That Turns Ordinary Birthdays Into Legends
You want a dessert that makes people whip out their phones, gasp, and then immediately ask for the recipe. This Rainbow Unicorn Cake is your mic drop. It’s colorful, loud, and unapologetically extra—like the glittery hype friend every party deserves.
Moist vanilla layers, electric buttercream, and a sprinkle explosion? Yes. And it’s surprisingly doable, even if your piping skills are “work in progress.” Ready to build the dessert that steals the spotlight and the last slice?
The Secret Behind This Recipe
The magic here is balance: bold color outside, soft, buttery crumb inside.
We use a tender vanilla sponge that actually tastes like cake (not just sugar and food coloring), plus a reliable American buttercream that pipes smooth and sets sturdy. The swirl unicorn mane is created with three or four tinted buttercreams loaded into one bag—no fancy tool chest required. For the wow factor, you’ll layer subtle vanilla with a hint of almond extract.
That micro-shift in flavor makes people go, “Wait, what is that?” Bonus: a simple white-chocolate drip and edible glitter for the unicorn sparkle. Because extra is the point.
What Goes Into This Recipe – Ingredients
- For the cake layers (three 8-inch rounds):
- 3 cups (360 g) all-purpose flour
- 2 1/2 tsp baking powder
- 1/2 tsp baking soda
- 1 tsp fine sea salt
- 1 cup (226 g) unsalted butter, room temperature
- 1 3/4 cups (350 g) granulated sugar
- 4 large eggs, room temperature
- 1 tbsp pure vanilla extract
- 1/2 tsp almond extract (optional but clutch)
- 1 1/3 cups (320 ml) whole milk, room temperature
- 2/3 cup (160 ml) sour cream, room temperature
- For the American buttercream:
- 2 cups (452 g) unsalted butter, room temperature
- 7–8 cups (840–960 g) powdered sugar, sifted
- 1/2 tsp fine sea salt
- 2 tsp pure vanilla extract
- 3–6 tbsp heavy cream or milk
- Gel food coloring: pink, purple, teal, yellow (or your unicorn palette)
- For the white chocolate drip (optional but iconic):
- 6 oz (170 g) white chocolate, finely chopped
- 1/3 cup (80 ml) heavy cream
- Decor:
- Rainbow sprinkles and star sprinkles
- Edible glitter or luster dust
- Gold fondant horn and ears (store-bought or homemade)
- Piping bags + star/open-star tips
Let’s Get Cooking – Instructions
- Prep pans and oven. Heat oven to 350°F (177°C). Grease three 8-inch cake pans, line bottoms with parchment, and lightly flour sides.
- Whisk dry ingredients. Combine flour, baking powder, baking soda, and salt in a bowl.
Set aside.
- Cream the butter and sugar. Beat butter and sugar on medium-high for 3–4 minutes until fluffy and noticeably lighter. This is your lift—don’t rush it.
- Add eggs and extracts. Add eggs one at a time, mixing well and scraping bowl. Beat in vanilla and almond extract.
- Mix wet ingredients. In a separate cup, whisk milk and sour cream until smooth.
- Combine. Add dry ingredients in three parts, alternating with the milk-sour cream mix, starting and ending with dry.
Mix on low until just combined. Don’t overmix unless dense cake is your jam.
- Divide and bake. Evenly portion batter into pans. Bake 23–28 minutes until a toothpick comes out with a few moist crumbs.
Cool 10 minutes, then turn out onto racks and cool completely.
- Make buttercream. Beat butter on medium-high until smooth and pale, 2 minutes. Add powdered sugar gradually with salt, then vanilla. Add cream 1 tbsp at a time to reach thick, spreadable consistency.
Beat 2–3 minutes for silky texture.
- Tint the magic. Divide about half the buttercream into 3–4 bowls. Tint with gel colors: pink, purple, teal, yellow. Keep the remaining half white for crumb coat and base.
- Layer and crumb coat. Level cooled cakes.
Place first layer on board, spread a generous layer of white buttercream. Repeat with remaining layers. Apply a thin crumb coat around the cake.
Chill 20–30 minutes.
- Final coat. Apply a smooth final layer of white buttercream. Use a bench scraper for clean sides. Chill again 15 minutes to set.
- Make the drip (optional). Heat cream until steaming, pour over white chocolate, wait 2 minutes, then stir until smooth.
Cool to slightly warm. Test a drip on the back of the cake—if it runs too far, it’s too warm.
- Drip it. Using a spoon or squeeze bottle, create drips around the top edge, then fill the center with a thin layer. Chill 10 minutes to set.
- Pipe the mane. Fit a piping bag with a large star tip.
Swipe stripes of colored buttercreams inside the bag for a multi-color effect, or load each color into separate bags. Pipe rosettes, swirls, and stars along one side and across the top-back to mimic a flowing mane.
- Decorate. Add sprinkles to the base and mane. Dust with edible glitter because obviously.
Place the horn and ears on top.
- Chill and serve. Refrigerate 20–30 minutes to set. Let sit at room temp 20–30 minutes before slicing for best texture.
Preservation Guide
- Room temp: Covered cake holds 1–2 days if your kitchen is cool (65–70°F). Avoid direct sun unless melted unicorn is your aesthetic.
- Refrigerator: Store tightly covered up to 5 days.
Bring slices to room temp for 20 minutes before serving.
- Freezer: Wrap unfrosted layers in plastic + foil up to 2 months. Thaw in fridge overnight, then frost. Frosted slices can be frozen individually for 1 month; thaw in fridge.
- Drip and sprinkles: Keep humidity low to prevent color bleed.
FYI, metallic glitter stays prettiest when chilled.
Nutritional Perks
Let’s be real: this is celebration food, not a kale smoothie. Still, there are wins. Butter-based cakes are more satisfying, so smaller slices feel indulgent without seconds.
White chocolate and dairy add a bit of calcium, and eggs deliver protein for structure. For balance, pair with berries to cut sweetness and add fiber. And if you’re ingredient-conscious, you can reduce overall sugar in the buttercream by 1–1.5 cups without wrecking stability.
Small tweaks, big payoffs.
Avoid These Mistakes
- Cold ingredients. Room-temp butter, eggs, and dairy are non-negotiable for a smooth batter and even rise.
- Overmixing. Once flour goes in, mix on low until just combined. Overmixing = tough cake. Sad.
- Too-warm drip. Hot ganache runs to the plate.
Let it cool to slightly warm before dripping.
- Skipping the crumb coat. That thin first layer locks crumbs in. It’s the difference between pro and “oops.”
- Using liquid food coloring. Gel colors give saturation without thinning the buttercream. IMO, they’re mandatory.
- Not chilling between steps. Short chills help layers set, drips firm, and piping hold shape.
Variations You Can Try
- Funfetti layers: Fold 1/2 cup rainbow jimmies into the batter for confetti inside and out.
- Lemon-vanilla. Add zest of 2 lemons and swap 1/4 cup milk for lemon juice.
Pair with lemon curd between layers.
- Strawberry swirl. Marble 1/2 cup thick strawberry puree into each pan for fruity ribbons.
- Chocolate unicorn. Use a cocoa-based sponge and keep the unicorn mane pastel for contrast. White-chocolate drip still works.
- Gluten-free. Substitute a 1:1 gluten-free flour blend with xanthan gum. Add an extra tablespoon of milk if batter seems thick.
- Dairy-free. Use vegan butter, plant milk, and a coconut cream-based ganache.
Results are still glam.
FAQ
Can I make the layers ahead of time?
Yes. Bake, cool completely, wrap tightly in plastic, and refrigerate up to 2 days or freeze up to 2 months. Thaw in the fridge, then bring to room temp before frosting.
What if I don’t have three 8-inch pans?
Bake in two 9-inch pans for 28–34 minutes, then split each layer in half for four thinner layers.
Or bake in batches—just don’t let mixed batter sit more than 20 minutes.
How do I get super vibrant colors?
Use gel or oil-based colors and start with a bright white buttercream. Whip butter thoroughly and, if needed, add a drop of purple to neutralize yellow. Resting tinted buttercream 15 minutes deepens color.
My buttercream is too sweet.
Help?
Add a pinch more salt, a teaspoon of lemon juice, or 2 tablespoons of cream cheese to cut sweetness. You can also reduce powdered sugar slightly and whip longer for volume.
How do I make a stable unicorn horn?
Shape fondant around a skewer, twist, and let dry at least 24 hours. Brush with edible gold paint or luster dust mixed with clear alcohol.
Insert the skewer into the chilled cake for support.
Can I skip the drip?
Totally. Smooth white sides with a bold rainbow mane and heavy sprinkle border still deliver maximum “wow.” The drip is flair, not mandatory.
The Bottom Line
This Rainbow Unicorn Cake isn’t just dessert—it’s a flex. With a tender vanilla crumb, plush buttercream, and eye-popping colors, it earns its applause before the first slice hits the plate.
Follow the chill-crumb-coat-drip routine, keep colors bold, and pipe that mane like you mean it. The result? A party centerpiece that tastes as magical as it looks—no fairy dust required.
Printable Recipe Card
Want just the essential recipe details without scrolling through the article? Get our printable recipe card with just the ingredients and instructions.